This topic describes the steps required for the following:
To create a new event:
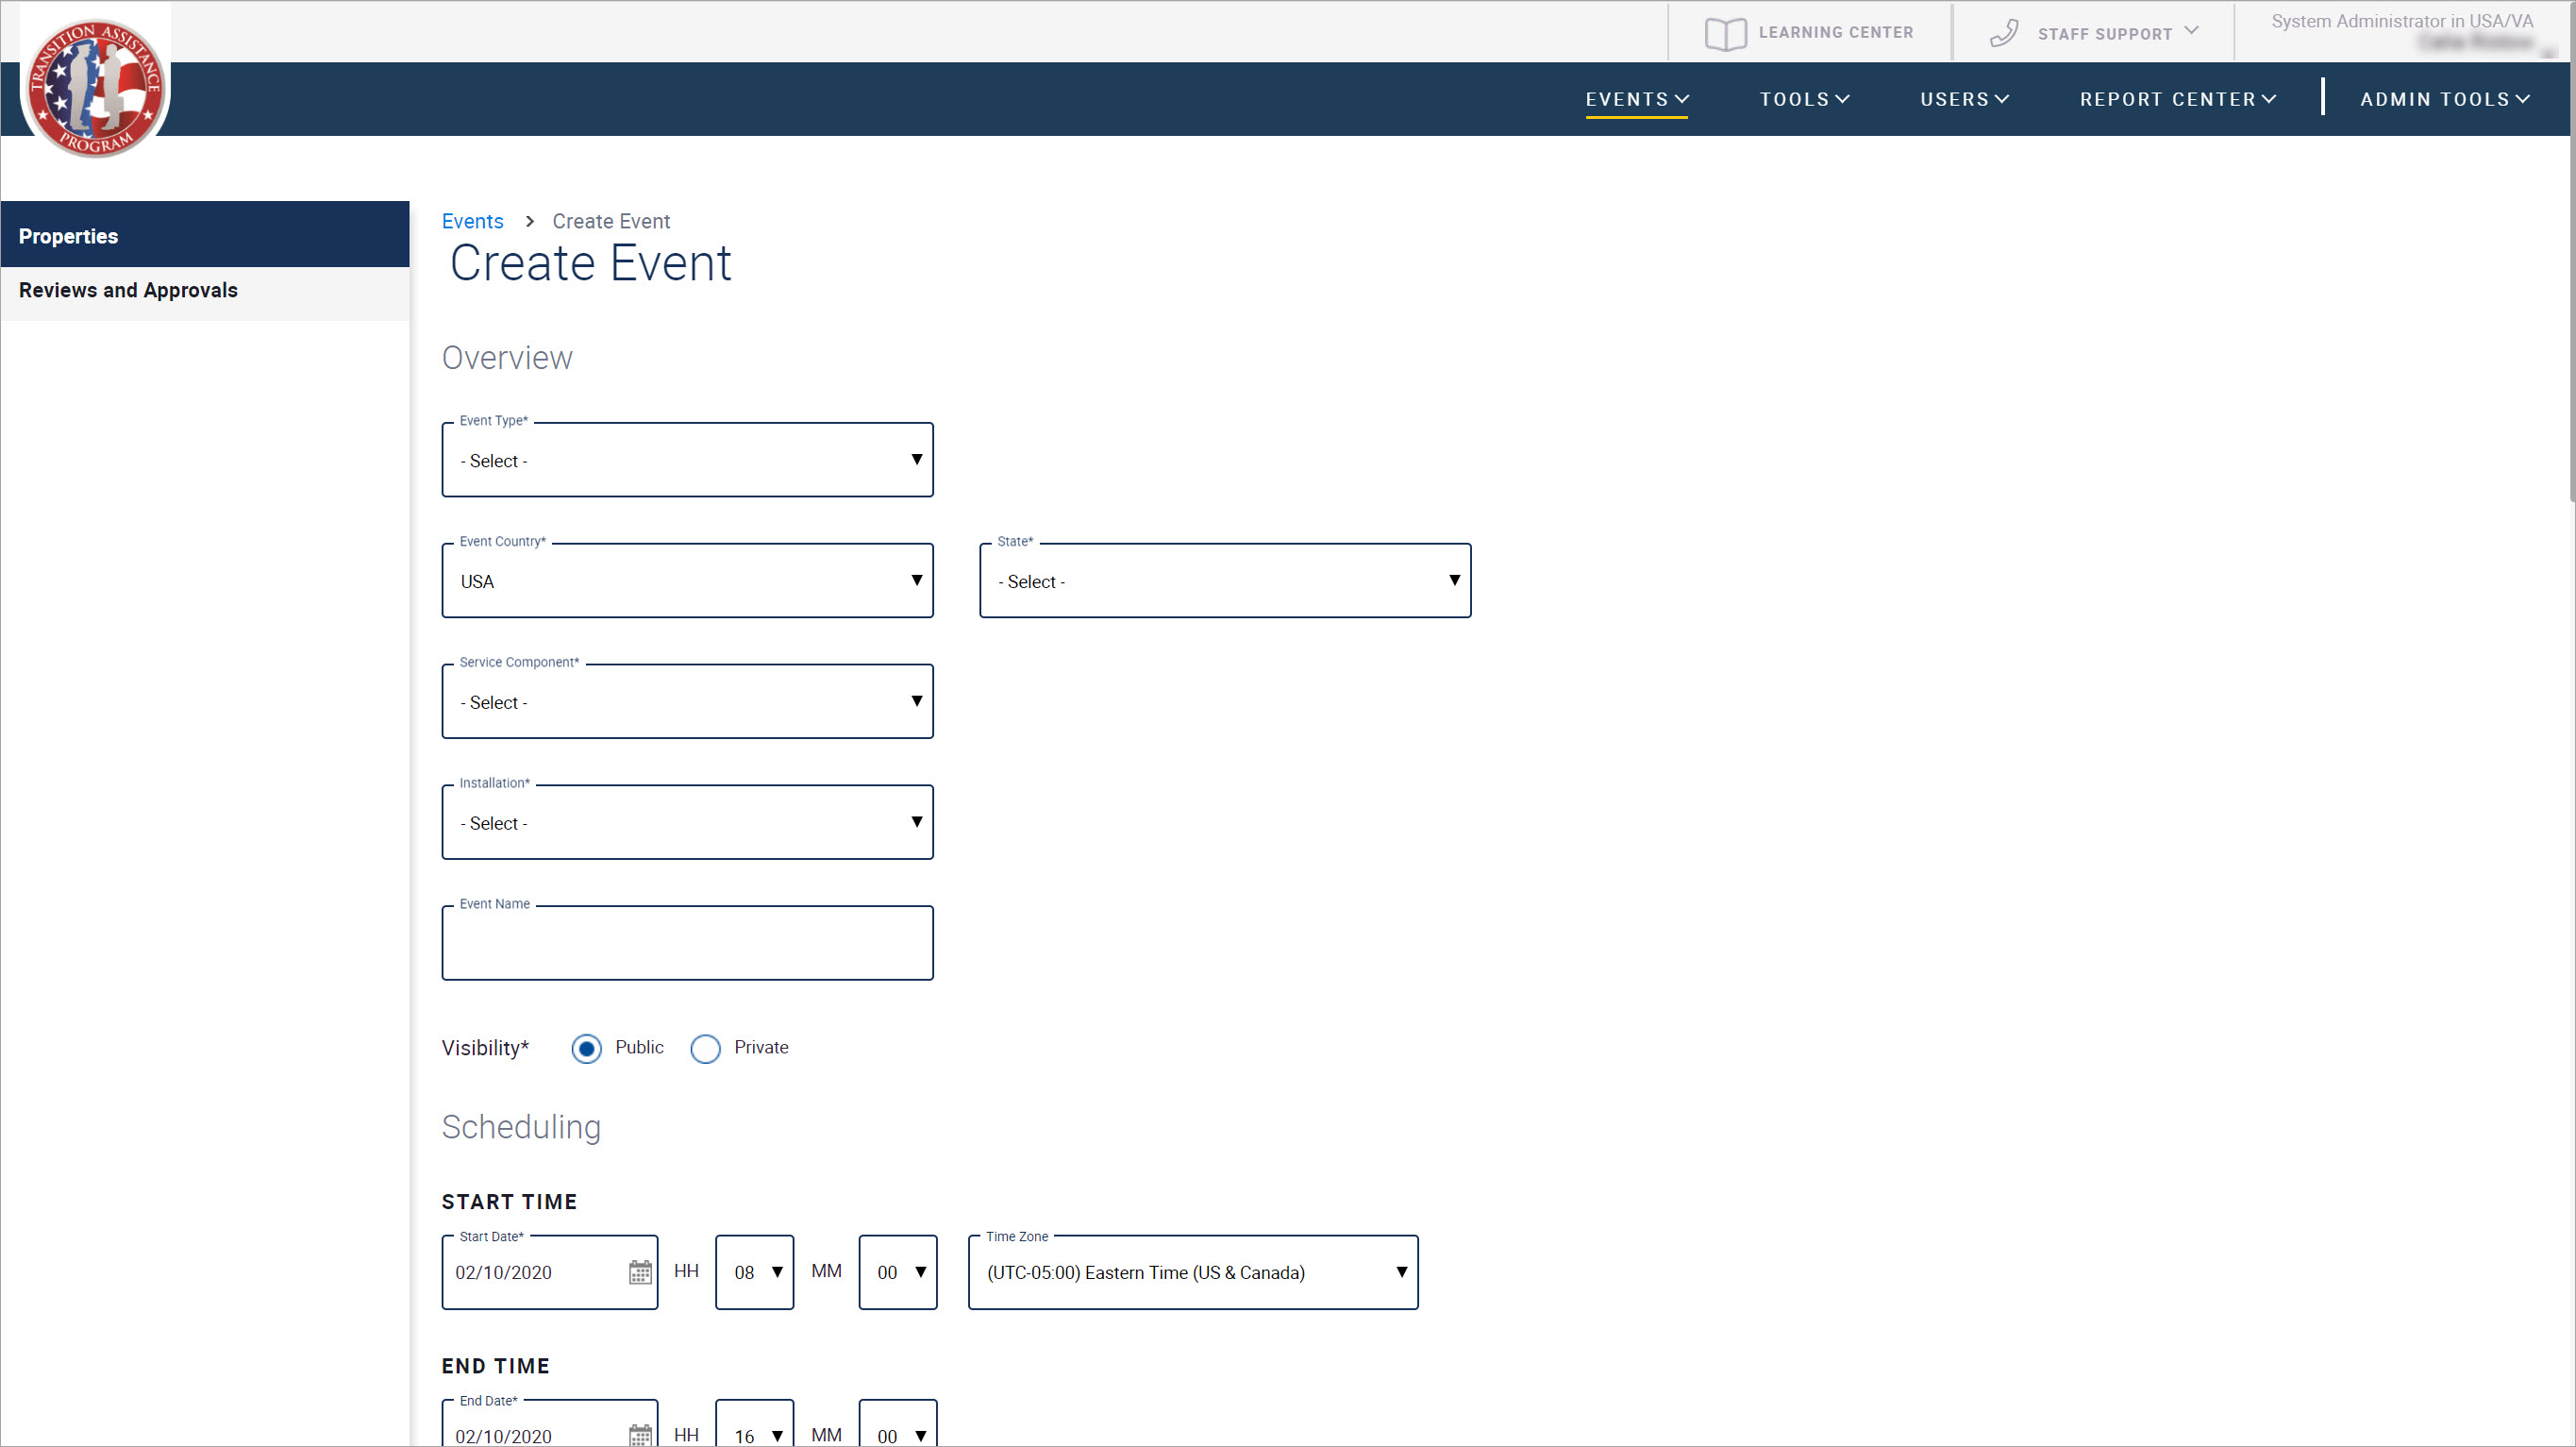
1. In TAP EventPLUS, hover over EVENTS on the menu bar, and click CREATE EVENT. The Create Event (Properties) page appears.

2. Complete the properties of the new event on the Create Event (Properties) page as follows:
3. Once you have finished completing the properties for your event, scroll to the bottom of the page and do one of the following:
Click SUBMIT FOR APPROVAL to send your event for review and approval by leadership.
Note: If you do not have the authority to publish events, a SUBMIT FOR APPROVAL button appears instead. Click this button to send your event for review and approval by leadership.
Click SAVE DRAFT to save your event as a draft, to be published later.
Click CANCEL to exit the event creation process without saving.
At any point during the approval process or after an event has been published, TAP staff are able to edit their events.
On the Event Details page, click Manage Event, and then Edit Event in the drop-down. The Edit Event page is displayed, on the Properties tab.
Update the details accordingly. Once you have made the appropriate changes, scroll to the bottom of the page and do one of the following:
Click SUBMIT FOR APPROVAL to send your event for review and approval by leadership.
Note: If you do not have the authority to publish events, a SUBMIT FOR APPROVAL button appears instead. Click this button to send your event for review and approval by leadership.
Click SAVE DRAFT to save your event as a draft, to be published later.
Click CANCEL to exit the event creation process without saving.